MapReduce源码分析1-任务提交流程与切片

从MapReduce的源码看一下MapReduce的一些具体实现方法。

关于Mapreduce的原理部分可以参考我之前的一篇文章:MapReduce的原理
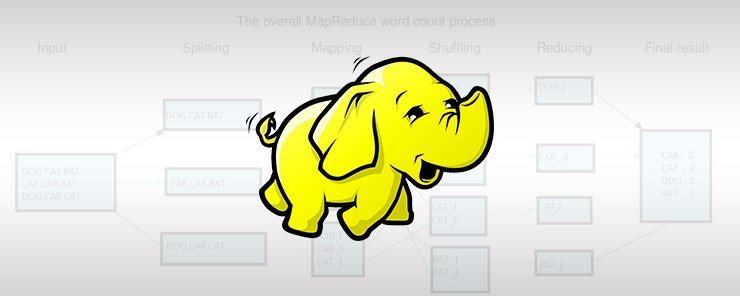
日志解析实例

从一个日志解析的实例来看一下 MapReduce 程序在执行过程中的具体代码执行过程,以及 MapReduce 功能的一些具体代码实现。一般情况下我们编写 MapReduce 程序时在提交 MapReduce 作业时会是到一个函数: waitForCompletion ,这就是源码分析的入口函数,我将会从这个函数展开,一步步学习和分析下 MapReduce 程序的内部源码实现。

下面是一个简单MapReduce程序的代码,不是 WordCount ,是一个日志分析的MapReduce程序,而且只是为了说明 MapReduce 的基本用法,没有设置Reduce类,仅仅实现了Mapper,对日志中的内容进行解析和重组,重新输出到 HDFS 上。

代码链接点这里

main函数中重要的代码如下:

1
2
3
4
5
6
7
8
9
10
11
12
13
14
15
16
17
18
19
20
21
22
23
24
25
public static void main(String[] args) throws IOException, ClassNotFoundException, InterruptedException {
//创建job
Configuration config = new Configuration();
Job job = Job.getInstance(config);
//通过job设置一些参数
job.setJarByClass(ParseLogJob.class);
job.setJobName("parselog");
job.setMapperClass(LogMapper.class);
//设置reduce个数为0,因为没有使用reduce所以必须设置为0
job.setNumReduceTasks(0);

//添加输入和输出数据
FileInputFormat.addInputPath(job, new Path(args[0]));
Path outputPath = new Path(args[1]);
FileOutputFormat.setOutputPath(job, outputPath);
//如果输出路径已经存在就先删除,这只在测试阶段使用,生产环境一般不用,因为数据可能存在价值一般不会删除数据
FileSystem fs = FileSystem.get(config);
if (fs.exists(outputPath)) {
fs.delete(outputPath, true);
}
//运行程序
if (!job.waitForCompletion(true)) {
throw new RuntimeException(job.getJobName() + "failed!");
}
}

获取配置信息的 Configuration 类

MapReduce程序要提交到 Hadoop 的 Yarn 上运行,使用的是一个叫Job的封装类,里面包含了一些设置 MapReduce 任务执行时可以配置的一些参数,比如设置Job名称、试着使用的Mapper类、获取Job的运行状态等等,
这个类实现了 JobContext 接口,JobContext 也就是Job的上下文信息,规定了job运行过程中可以获得的Job信息有哪些。

获得Job的方式一般是通过 Configuration 实例来配置Job后获得一个Job,使用Configuration时,就可以将Hadoop的配置信息读取进来,Configuration中有这样一段静态代码块。

1
2
3
4
5
6
7
8
9
10
11
12
13
14
15
16
static{
//print deprecation warning if hadoop-site.xml is found in classpath
ClassLoader cL = Thread.currentThread().getContextClassLoader();
if (cL == null) {
cL = Configuration.class.getClassLoader();
}
if(cL.getResource("hadoop-site.xml")!=null) {
LOG.warn("DEPRECATED: hadoop-site.xml found in the classpath. " +
"Usage of hadoop-site.xml is deprecated. Instead use core-site.xml, "
+ "mapred-site.xml and hdfs-site.xml to override properties of " +
"core-default.xml, mapred-default.xml and hdfs-default.xml " +
"respectively");
}
addDefaultResource("core-default.xml");
addDefaultResource("core-site.xml");
}

我们知道静态代码块时在当前类在被加载时最先执行的代码,是而且仅执行一次,是给类初始化时用的,对比来看,构造函数是给对象初始化时用的。通过上面的代码,就将本地配置的 Hadoop 环境中的默认配置文件加载到内存中。

这里的 addDefaultResource 函数是将配置文件名添加到一个 CopyOnWriteArrayList 中, CopyOnWriteArrayList 是一个采用了 Copy on Write 模式的线程安全的 ArrayList,在这里使用是为了保证多线程环境下 Configuration 能够安全地工作。

1
2
3
4
5
6
7
8
9
10
11
12
13
14
15
  private static final CopyOnWriteArrayList<String> defaultResources =
new CopyOnWriteArrayList<String>();

....

public static synchronized void addDefaultResource(String name) {
if(!defaultResources.contains(name)) {
defaultResources.add(name);
for(Configuration conf : REGISTRY.keySet()) {
if(conf.loadDefaults) {
conf.reloadConfiguration();
}
}
}
}

需要说明的是 Configuration 加载配置文件的方式使用的是懒加载方式(Lazy Loading),在创建 Configuration 对象时,并没有立即将配置文件解析加载进对象中,而是只在后续使用到相应的配置文件内的信息时再进行解析和加载。

关于configuration的详细信息可以参考这篇Hadoop 中的 Configuration,讲的很详细。

MapReduce作业提交者 - Job

Job 是 MapReduce 作业的单位,一个Job对应一个 MapReduce 作业,MapReduce 作业在实际运行中由Job创建和提交 Hadoop 集群运行。在创建 MapReduce 作业时,可以通过 Job 对 MapReduce 运行时的参数进行配置,从而更好地控制作业的执行,提高运行效率,节省集群资源,这就是 MapRedude 调优相关的内容了,不再展开。

上面说到Job一般是使用 Configuration 对象创建的:

1
2
Configuration config = new Configuration();
Job job = Job.getInstance(config);

另外通过Job可以设置MapReduce任务执行时的一些参数,比如设置Job名称、试着使用的Mapper类、获取Job的运行状态等等。

1
2
3
4
5
6
//通过job设置一些参数
job.setJarByClass(ParseLogJob.class);
job.setJobName("parselog");
job.setMapperClass(LogMapper.class);
//设置reduce个数为0,因为没有使用reduce所以必须设置为0
job.setNumReduceTasks(0);

真正的提交者 - waitForCompletion

在加载好配置文件(注意是懒加载,真正使用到相关配置信息时才会从文件中解析和加载配置信息),创建好Job后,由job的waitForCompletion进行任务的提交操作,waitForCompletion源码如下:

1
2
3
4
5
6
7
8
9
10
11
12
13
14
15
16
17
18
19
20
21
22
23
24
25
26
27
28
29
30
31
/**
* Submit the job to the cluster and wait for it to finish.
* @param verbose print the progress to the user
* @return true if the job succeeded
* @throws IOException thrown if the communication with the
* <code>JobTracker</code> is lost
*/
public boolean waitForCompletion(boolean verbose
) throws IOException, InterruptedException,
ClassNotFoundException {
if (state == JobState.DEFINE) {
//真正的提交操作
submit();
}
if (verbose) {
//监控任务运行过程中的状态信息并打印到终端
monitorAndPrintJob();
} else {
// get the completion poll interval from the client.
int completionPollIntervalMillis =
Job.getCompletionPollInterval(cluster.getConf());
while (!isComplete()) {
try {
Thread.sleep(completionPollIntervalMillis);
} catch (InterruptedException ie) {
}
}
}
//返回作业运行结果
return isSuccessful();
}

这里面真正的提交操作时 submit 函数,展开 submit 函数:

1
2
3
4
5
6
7
8
9
10
11
12
13
14
15
16
17
18
19
20
21
22
23
/**
* Submit the job to the cluster and return immediately.
* @throws IOException
*/
public void submit()
throws IOException, InterruptedException, ClassNotFoundException {
ensureState(JobState.DEFINE);
//使用新的 MapReduce API
setUseNewAPI();
//连接YARN,进行通信
connect();
final JobSubmitter submitter =
getJobSubmitter(cluster.getFileSystem(), cluster.getClient());
status = ugi.doAs(new PrivilegedExceptionAction<JobStatus>() {
public JobStatus run() throws IOException, InterruptedException,
ClassNotFoundException {
//执行作业的提交操作
return submitter.submitJobInternal(Job.this, cluster);
}
});
state = JobState.RUNNING;
LOG.info("The url to track the job: " + getTrackingURL());
}

submit 中setUserNewAPI表示使用新版MapReduceAPI(Hadoop1.x的旧版没有YARN,Hadoop2.x开始支持YARN,采用了新的 MapReduce API), connect() 表示连接YARN的ResourceManager,进行ApplicationMaster和相关资源的申请,具体流程参考YARN的原理那篇文章,这里先不展开分析。

connect 中会为 Cluster 的对象 cluster 赋值:

1
2
3
4
5
6
7
8
9
10
11
12
13
private synchronized void connect()
throws IOException, InterruptedException, ClassNotFoundException {
if (cluster == null) {
cluster =
ugi.doAs(new PrivilegedExceptionAction<Cluster>() {
public Cluster run()
throws IOException, InterruptedException,
ClassNotFoundException {
return new Cluster(getConfiguration());
}
});
}
}

通过 clster 可以得到一个 JobSubmitter 对象 submitter ,最后由 submitter 进行作业的提交

1
2
3
4
5
6
7
8
final JobSubmitter submitter = 
getJobSubmitter(cluster.getFileSystem(), cluster.getClient());
status = ugi.doAs(new PrivilegedExceptionAction<JobStatus>() {
public JobStatus run() throws IOException, InterruptedException,
ClassNotFoundException {
return submitter.submitJobInternal(Job.this, cluster);
}
});

通过查看 submitJobInternal 的描述信息,我们就能知道这个函数就是真正的逻辑计算所在的地方:

1
2
3
4
5
6
7
8
9
10
11
12
13
14
15
16
17
18
Internal method for submitting jobs to the system.
The job submission process involves:
Checking the input and output specifications of the job.
Computing the InputSplits for the job.
Setup the requisite accounting information for the DistributedCache of the job, if necessary.
Copying the job's jar and configuration to the map-reduce system directory on the distributed file-system.
Submitting the job to the JobTracker and optionally monitoring it's status.

Params:
job – the configuration to submit
cluster – the handle to the Cluster
Throws:
ClassNotFoundException –
InterruptedException –
java.io.IOException
Inferred annotations:
Parameter job: @org.jetbrains.annotations.NotNull
Parameter cluster: @org.jetbrains.annotations.NotNull

真正的幕后主使 - submitJobInternal

通过层层递进,发现最终执行计算任务的是一个Jobsubmitter类中的一个叫做submitJobInternal()的方法。进入这个方法,因为内部代码太长,我们看重点,这里调用了一个 writeSplits() 方法,这就是分片操作实现:

1
2
3
4
5
6
7
8
9
10
JobStatus submitJobInternal(Job job, Cluster cluster) 
throws ClassNotFoundException, InterruptedException, IOException {
......
// Create the splits for the job
LOG.debug("Creating splits at " + jtFs.makeQualified(submitJobDir));
int maps = writeSplits(job, submitJobDir);
conf.setInt(MRJobConfig.NUM_MAPS, maps);
LOG.info("number of splits:" + maps);
......
}

MapReduce 分片操作

通过注释也可以知道,这是map分片的相关操作,接着看,进入 writeSplits 方法内部看一下,里面有个分支判断,用于选择使用那种分片方法:

1
2
3
4
5
if (jConf.getUseNewMapper()) {
maps = writeNewSplits(job, jobSubmitDir);
} else {
maps = writeOldSplits(jConf, jobSubmitDir);
}

我们使用的是 Hadoop2.x 版本的 MapReduce 框架,所以肯定是调用 writeNewSplits,再进入 writeNewSplits 看一下:

1
2
3
4
5
6
7
8
9
10
11
12
13
14
15
16
17
18
19
private <T extends InputSplit>
int writeNewSplits(JobContext job, Path jobSubmitDir) throws IOException,
InterruptedException, ClassNotFoundException {
//先从job中把Configuration拿出来
Configuration conf = job.getConfiguration();
//通过反射机制获取输入数据格式
InputFormat<?, ?> input =
ReflectionUtils.newInstance(job.getInputFormatClass(), conf);
//由输入类来做分片操作
List<InputSplit> splits = input.getSplits(job);
T[] array = (T[]) splits.toArray(new InputSplit[splits.size()]);

// sort the splits into order based on size, so that the biggest
// go first
Arrays.sort(array, new SplitComparator());
JobSplitWriter.createSplitFiles(jobSubmitDir, conf,
jobSubmitDir.getFileSystem(conf), array);
return array.length;
}

获取 Map 默认输入数据类型

这里内容较多,首先获取到 Configuration 的实例,然后获取Map输入数据类型,这个在main函数中设置job的时候我们可以自定义,如果没有定义,默认是Text类型的数据。为什么说默认是Text类型的数据呢?往下看就知道了,进入job.getInputFormatClass()的实现类JobContextImpl中:

1
2
3
4
5
6
7
8
9
10
11
/**
* Get the {@link InputFormat} class for the job.
*
* @return the {@link InputFormat} class for the job.
*/
@SuppressWarnings("unchecked")
public Class<? extends InputFormat<?,?>> getInputFormatClass()
throws ClassNotFoundException {
return (Class<? extends InputFormat<?,?>>)
conf.getClass(INPUT_FORMAT_CLASS_ATTR, TextInputFormat.class);
}

这里使用 conf.getClass 来获取输入数据类型,如果没有设置,默认就是 TextInputFormat 类型的数据,我们之前说的Map默认输入数据类型是Text,原来在代码中就在这里体现出来了。

获取 Map 分片

writeNewSplits 中还有一个 getSplits(job) 方法,根据继承关系,可以找到 FileInputformat类中实现了这个方法:

1
2
3
4
5
6
7
8
9
10
11
12
13
14
15
16
17
18
19
20
21
22
23
24
25
26
27
28
29
30
31
32
33
34
35
36
37
38
39
40
41
42
43
44
45
46
47
48
49
50
51
52
53
54
55
56
57
58
59
60
61
62
63
64
65
66
/** 
* Generate the list of files and make them into FileSplits.
* @param job the job context
* @throws IOException
*/
public List<InputSplit> getSplits(JobContext job) throws IOException {
StopWatch sw = new StopWatch().start();
//分片最小值和最大值
long minSize = Math.max(getFormatMinSplitSize(), getMinSplitSize(job));
long maxSize = getMaxSplitSize(job);

// generate splits 生成分片
List<InputSplit> splits = new ArrayList<InputSplit>();
List<FileStatus> files = listStatus(job); //将输入路径下的所有文件放入列表中
for (FileStatus file: files) {
Path path = file.getPath();
long length = file.getLen();
if (length != 0) {
BlockLocation[] blkLocations;
if (file instanceof LocatedFileStatus) {
blkLocations = ((LocatedFileStatus) file).getBlockLocations();
} else {
//获取分布式文件系统块信息
FileSystem fs = path.getFileSystem(job.getConfiguration());
blkLocations = fs.getFileBlockLocations(file, 0, length);
}
if (isSplitable(job, path)) { //允许切片
//获取切片大小
long blockSize = file.getBlockSize();
long splitSize = computeSplitSize(blockSize, minSize, maxSize);

long bytesRemaining = length;
while (((double) bytesRemaining)/splitSize > SPLIT_SLOP) {
//获取切片索引
int blkIndex = getBlockIndex(blkLocations, length-bytesRemaining);
//往切片表中添加切片信息
splits.add(makeSplit(path, length-bytesRemaining, splitSize,
blkLocations[blkIndex].getHosts(),
blkLocations[blkIndex].getCachedHosts()));
bytesRemaining -= splitSize;
}

if (bytesRemaining != 0) {
int blkIndex = getBlockIndex(blkLocations, length-bytesRemaining);
splits.add(makeSplit(path, length-bytesRemaining, bytesRemaining,
blkLocations[blkIndex].getHosts(),
blkLocations[blkIndex].getCachedHosts()));
}
} else { // not splitable
splits.add(makeSplit(path, 0, length, blkLocations[0].getHosts(),
blkLocations[0].getCachedHosts()));
}
} else {
//Create empty hosts array for zero length files
splits.add(makeSplit(path, 0, length, new String[0]));
}
}
// Save the number of input files for metrics/loadgen
job.getConfiguration().setLong(NUM_INPUT_FILES, files.size());
sw.stop();
if (LOG.isDebugEnabled()) {
LOG.debug("Total # of splits generated by getSplits: " + splits.size()
+ ", TimeTaken: " + sw.now(TimeUnit.MILLISECONDS));
}
return splits;
}

首先是获取minSize 和 maxSize分别是分片的最小值和最大值,最小值的计算方法是取 getFormatMinSplitSize()getMinSplitSize(job) 之中的最大值,getFormatMinSplitSize() 这里设置的是1,而getMinSplitSize(job)是从配置中获取最小值的配置信息,如果没有配置默认也是1。这就是分片最小值的默认情况,默认最小值为1. 分片最大值是通过 getMaxSplitSize(job) 方法获取的,如果没有配置,默认获取到的是Long的最大值0x7fffffffffffffffL。

然后获取输入路径下的所有文件,我们这里使用的输入是HDFS文件目录, listStatus 方法会将输入路径下的每个文件信息放入FileStatus组成的列表中,接下来的遍历操作就可以正对每个文件进行分片处理了。

接下来的遍历操作就是计算每个文件切片的逻辑代码,先获取文件的路径和大小,然后通过路径和配置文件信息获取分布式文件系统对象 FileSystem ,通过 FileSystem 的 getFileBlockLocations 方法就可以获取到分布式文件的块信息。

根据配置信息判断当前文件是否允许切片(分片),允许切片才会由接下来的操作。先获取块大小blockSize,然后获取切片大小,这里需要注意的是切片大小的获取方法,它是通在 blockSize 、 maxSiz e和 minSize 中先找出 maxSize 和 blockSize 的最小值 min ,然后再将这个最小值min与minSize对比,找出二者中的最大值。默认情况下切片大小等于块的大小。这样做的目的是防止切片大小大于块的大小,因为如果切片值大于块的大小,那么一个切片在后面计算完落盘的时候就会存储到不同的HDFS块中,而不同的块又可能分散在集群中的各个节点上,不利于后期再次读写这个分片数据。

通过控制 minSize 和 maxSiz 的大小,就可以实现调整分片大小的问题。

接下来是根据计算出来的切片大小 splitSize 和 文件大小 length ,将文件切片并将每个切片的信息放入切片列表 splits 中,实现的大致思路是先获取切片的索引位置,再将文件path、起始偏移量、分片大小、块的host信息、块的缓冲信息组织成切片信息,存放到splits中。splits中存放的内容大概如下表所示:

file start spliteSize hosts inMemoryHosts
file1 0 4 node1 node2 node3 node4
file1 4 4 node1 node2 node3 node4
file2 0 4 node1 node2 node3 node4
file2 4 4 node1 node2 node3 node4

也就是最终会有四个分片信息,最终会调用4个Map任务进行处理。

总结

到现在为止,我们分析了从配置文件的读取到job的创建,然后是任务的提交,其中任务的提交分析到了分片的具体代码实现,先到这里,下次接着从代码里看一下真正干事儿的MapTask和ReduceTask是怎么工作的。


参考文章

configuration-in-hadoop